Toshiba Satellite C55-A5300 with SSD
Best Buy has been running a sale on the Toshiba Satellite C55-A5300 for $229. At one point they even had the Skull Candy headphones – the one I chose is the S6HSDZ-072. It’s a $60 value and it was free. Here are the key specs of the laptop.
- Intel Celeron 1037U 1.8GHz (Ivy Bridge)
- 4GB DDR3 1333MHz (installed in 1 of 2 slots, can be maximized to 16GB and run up to 1600HMz)
- 500GB HDD 5400RPM
- Intel HD Graphics (integrated and shared)
- LAN 10/100 (not gigabit)
- 15.6” widescreen TruBrite at 1366×768 (supports 720p content)
- HDMI port
- SDHC size card reader
- Windows 8 (upgradeable to 8.1)
So the specs aren’t jawdropping but for the price it’s a very good deal. I picked one up and the first thing I did is swap out that horrendous hard drive. Running at 5400RPM and it’s not SSD makes me cringe. All my computers, except for my 2008 iMac are running on SSD. It’s hard to go back to regular HDD.
The upgrade is very easy. First, you will need to boot to the desktop. So I had to let the laptop initialize and answer a few questions. Next, I created DVD restore discs using the Toshiba Recovery Media Creator software. This is how I will get the OS onto the new hard drive. Laptops no longer come with restore discs. It’s been this way for many years now. They usually have a hidden partition on the hard drive if the computer needs to be restored. You can also order a copy of the restore discs for around $16. Or, if you’re lucky, the computer comes with software that will allow you to make your own. For this particular laptop, you can use 3x 4GB DVD-R or 16GB+ USB thumb drive. I went with the DVDs and the process took about an hour to create. Make sure you label the DVD discs so you know which goes first, second, and third. When restoring it will ask you for all 3.
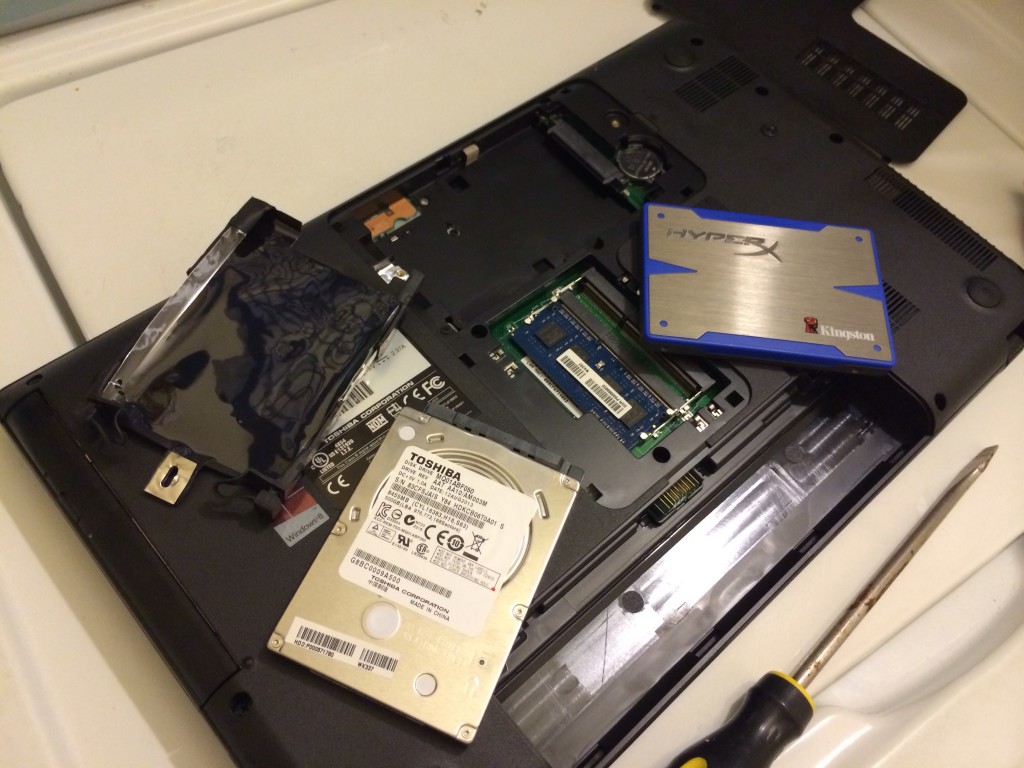
Once I got the DVDs made, it’s time to open up the laptop. Ensure that it’s unplug and the battery is removed. Flip the laptop over so the bottom is up. There is a screw holding in the panel that covers both HDD and ram. After you remove the panel, you will need to remove another screw that’s holding the HDD in place. Lift up from the screw area once your remove the screw. Swap the HDD with the SSD. Close everything back up and boot off the DVD. I had a Kingston HyperX SSD 120GB lying around so I used it to play around with. With the SSD, boot up is under 15 seconds. I removed most of the Toshiba crapware and the Norton AV trial. Here are some pics I took.

Here is an Instagram video I recorded. You can see the whole boot up process all the way to the desktop within the 15 second time limit.


