My new Kingston SVP100S2B/96GR SSD drive
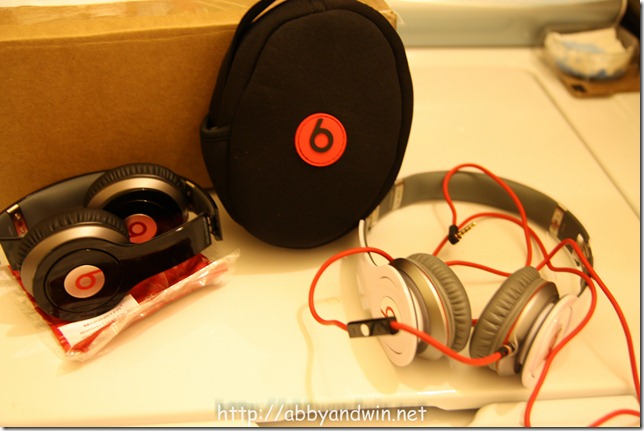
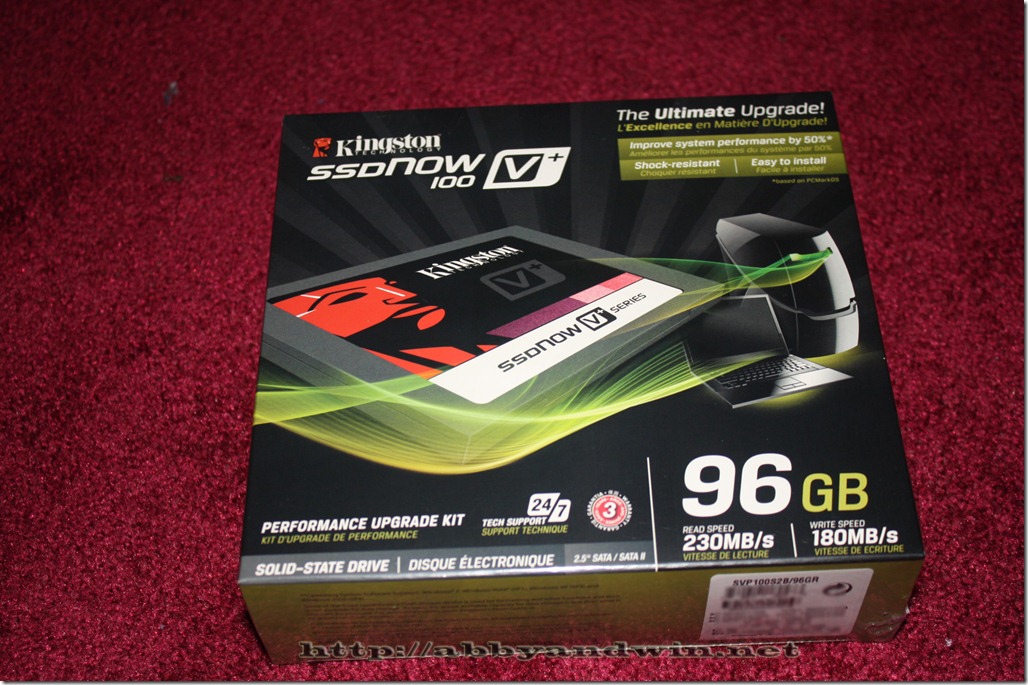
Newegg recently had a good deal on the Kings SVP100S2B/96GR SSD drive. It was $160 with a $50 mail in rebate, plus 10% off. So after everything, I would’ve paid about $1 per GB on an SSD. The advertised read speed is 230MB/s and write speed is 1810MB/s. I’ve always wanted to play with SSD drives but found them to be too expensive. So I jumped on this deal considering the price after rebate. Here are some pics I took during the unboxing.

The kit comes with a USB 2.0 enclosure, brackets, molex to SATA power cable, SATA cable, USB cable, and Acronis True Image software. This is $10 more than the OEM version and the software alone is worth it.
The software is great and easy to use. You just boot off it and you can clone your existing hard drive. At first, I tried to use a USB 3.0 enclosure with the SSD drive. I figured it might be quicker to do the cloning. I kept getting an error so I figured that the USB 3.0 drivers aren’t available or not compatible with the software. I ended up installing the SSD drive internally. I have a few free SATA ports.
After formatting, you will have 89GB of the 96GB available to you. I had to uninstall a lot of stuff just to get it down to that size before I can clone my old drive. Once finished, I was able to clone 86GB of data from a RAID10 to the SSD using SATA2 connection. This process took only 7 minutes. I got curious so I did the same clone: onto a 2.5” drive, 160GB. I’m not sure what if it was a 5400 or 7200 RPM drive. It’s a Hitachi that came with my old MBP 13”. It could be 5400RPM. This process took around 25 minutes.
Using the SSD, my Windows Experience Index of the hard drive improved from 6.1 (RAID10) to 6.9 (SSD).

My boot up time improved from around 68 seconds to 36 seconds. I was left with only 3GB of space left on the hard drive. I ended up using a 1TB drive where I installed applications and stored my documents. Every time I install something or save, I have to remember to do it on the D: drive. After a few days of this, I grown tired of it. I really hate it plus because I was installing things on the 1TB drive (non-RAID) it was somewhat slow especially installing more than one software at a time. I’m impatient haha. I missed my RAID10 performance.
So I ended up going back to my old configuration with the RAID10 and installed the 96GB SSD on my MBP 13”. Maybe once the prices have dropped on the larger SSD drives, I can try this again on my desktop and buy 4 of them to set up a RAID 10 or 2 for a RAID0. But right now most of those drives are $2+ per GB.
I don’t regret buying the drive even though I’m not using it on my desktop. The performance of my MBP 13” has improved. So no lost there. Just hope the rebate goes through.
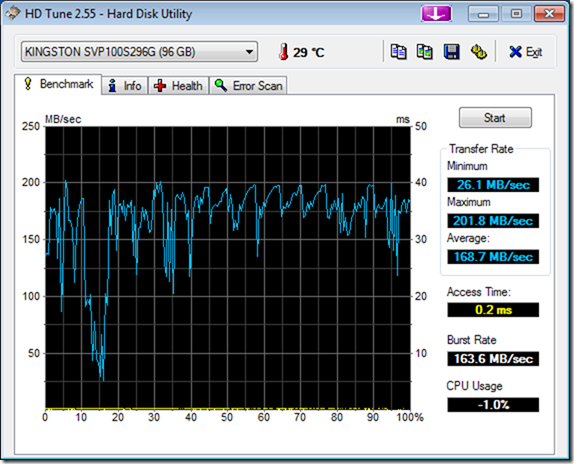
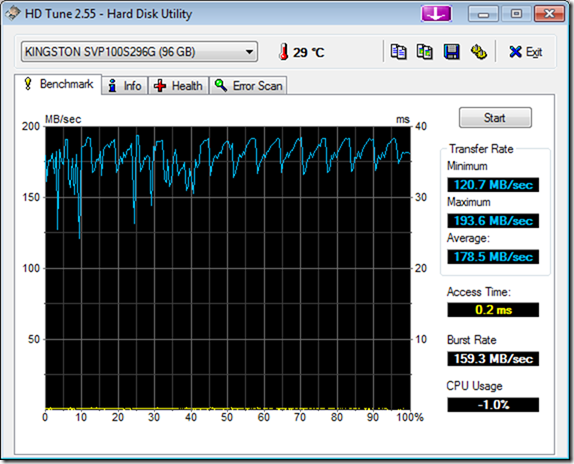
Here some more screen shots doing benchmarks between my RAID10 and the SSD drive. I don’t know what they mean. Hope someone can share some knowledge.
This is for my RAID10.

SSD benchmark with Windows 7 SP1.
SSD benchmark before Windows 7 SP1